

The restoration of the press is coming along nicely. I told myself I wanted to have it running by Christmas and I think I'll meet that goal. I'm almost desperate to begin printing on it but for a while at least I'll have to take comfort in the old maxim: patience is a virtue. I need to get my roller cores recovered and I won't likely be able to do that until after the first of the year.


As you can see from the photos I'm at the point where I'm putting the arms back on. I had started cleaning, step by step working my way from the lower back of the base upward. I used my old standard cleaning supplies: 3M green pads; WD-40; rolls and rolls of cheap paper towels; 150 grit sandpaper; and elbow grease.
My goal is almost never to strip things down to bare metal and restore it to factory new. It's an antique and has years of working patina and character that I try to preserve as much as possible. That much being said, I remove all dirt, built-up oil deposits, rust, loose paint, etc. I file off all burrs and make sure all machined surfaces are ready to rub against one another again with only a layer of fresh oil between them. When I find something so worn as to affect seriously the operation of the machine I repair it or replace it. I readjust all settings as necessary.
All of these steps are important, perhaps the last more than any. Over the years modifications get made to machinery, some good and some bad. People who don't know any better make adjustments incorrectly or don't repair things that should be repaired because they don't know any thing's wrong. For example, on the right lower leg of the press bed where the shaft that connects it to the base goes through there is a threaded hole. This is for a bolt that tightens against the shaft so the shaft and the bed casting move together. I wouldn't have ever known this if the presses had not been disassembled and I wasn't thoroughly cleaning them which is when I discovered the hole and asked myself: what's this hole for? The bearing surfaces for this shaft are actually in the base where there are oil holes. But in both this press and my old 8x12 these bolts went missing sometime in the distant past and the holes were filled with crud (sorry for the technical term). This meant that the bed had moved on the shaft when the press was running, at least part of the time. There are no oil holes in the bed casting at these points so the shaft and journals in the bed would simply wear down no matter how much oil was put in the oil holes for this shaft in the base. So it pays to study about and thoroughly go over a machine: know your press.
The press was moved in pieces on different occasions, the bed coming first. It had been laid on a standard furniture dolly and I rolled it out of the back of my van onto my back porch and up through the French doors into the living room by myself. Did I mention it was heavy? It was heavy. The base I had help with and we used the usual 3/4" pipe method to get it off the truck following the same route into the house.
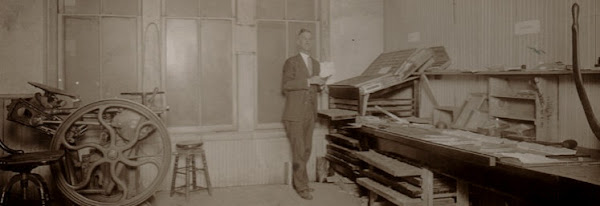
I started on the base and when that was done I pulled and slid it sideways onto more pipes so that it was lined up with the spot where it would finally rest. Then I rolled the bed behind it, cleaned the legs, bed face, and sides as well as the shaft. Then with a bit of heavy-duty fiddling got the holes lines up and pushed the shaft in. Using the heavy tie-down strap you see in the photo as a come-along I raised the bed high enough so that I could get under it enough to lift it up into place. Did I mention that it was heavy? It was heavy.
I tied the bed and base together as you can see in the photo for safety and then finished the cleaning. I made sure the press was lined up where I wanted it to go and then pushed/rolled it back to almost where you see it sitting now. I hadn't yet replaced the oil, grease, and dirt soaked original runners but did that next using some hickory we had laying round at work to make new ones (It's good to be a cabinetmaker). Using the scissor jack from my van and a 4x4 I lifted first one side and then the other, swapping the runners out. The I rolled the press back the rest of the way to where you see it in the photo. I then jacked up the back and removed a couple pipes and then did the same for the front. It ain't goin' anywhere now.
I'll leave the tie-down strap on until I get the drive shaft in and pinion gear and flywheel on. Though the side arms limit the movement, the drive train keeps the bed from simply flopping back. One more arm to go and then the drive shaft, etc.
I described all of this in some detail to show that there is no magic to doing this kind of work by yourself nor is the machine a living thing waiting to attack. Mechanical experience is definitely a plus but common sense goes a long way. You have to think and be careful but if you can't do that you shouldn't consider printing anyway since you're likely to lose some fingers. You also don't need to spend a lot of money or possibly any money to move a press and restore one. Except for the cleaning supplies, which were very inexpensive, it cost me nothing. I used short boards I had in the basement as ramps to get things from the van to the back porch and then up the stoop of the French doors. I also had several lengths of old 3/4" pipe from some pipe clamps but Home Depot has them cheap or perhaps a neighbor has some. The tie down strap I had from years ago from some other move. The jack came from my van. So if you're thinking of getting a press but the idea of moving it and setting it up intimidates you, ask some questions and use your head but you can do it!

1 comment:
Hi Rich:
Just a quick note to say thank you so much for your comment on my blog regarding the truck problem. It seems I was sent the wrong sized trucks after all, and I hadn't finally lost my mind.
Thank you again for the assistance!
Erin McCall
Sunlit Letterpress
Post a Comment