Monday, December 22, 2008

Transfiguration


Here it is in all its naturally lighted glory. It was a lot of work but I'm pleased with the result. Everything is running smooth and easy. I didn't keep close track of how long it took but I would estimate at least 30 hours.

The platen was out of adjustment so I took care of that too; I'll have to make a final test once I get rollers and pull a few test proofs. To make the initial setting I set a machinist's sliding wedge gauge to type high with a micrometer. I then stacked up a pressboard, three sheets of bond and one sheet of tag and had them slightly hanging over the edge of a table. I placed the gauge on top and took a reading of the total thickness with the micrometer. This gave me a reading of about .945. I wasn't really concerned with the actual number but with getting an accurate reading of a standard packing and the height of the type combined. I reset the wedge gauge accordingly and then clamped it in a Vise-grip for a handle. Then I used it to set each corner of the platen so the gauge slides in snugly: easy in and out but no play.

On my old 8x12 I tried at first the standard four-corners lockup with large sorts to adjust the platen but this didn't work well for me. I adjusted it a second time using the above method and it made a dramatic, positive difference in the impression. It did so well that I never had to make another adjustment other than standard makeready. I used this method because those were the tools I had. I chose the packing I did because that is what is recommended in the standard works, with slight variations. I substituted bond paper for book and I left out the cover sheet. I did this to allow for a bit more adjustment with the packing when dressing the platen. I'll see what a few proofs look like and experiment with different packing and then make any final adjustments if necessary. I don't want or intend to adjust the platen often. I want to have it at a setting that is as versatile as possible for whatever I may want to print.

An interesting discovery is that this press, like my 8x12 and other older presses including Pearls, has rails that are lower than type high. I've never yet discovered a reason why the presses were made this way and have not been able to come up with a reason myself, but it seems this was fairly common. What this means in practise is that the rollers and trucks must be different diameters, in my case the trucks need to be 1/8" larger than the rails. This of course flies in the face of the standard view that rollers and trucks must be the same diameter to prevent slurring. Personally I don't believe this view is correct. I think the usual argument from physics/mathematics is wrong. In fact I think physics/mathematics proves just the opposite, that the relationship to the axis at any given point is the same. Clearly some presses were made so only rollers and trucks of a different size would work. If slurring and imperfect work was a necessary result these presses would have ended up in the Ancient Press Graveyard long ago and clearly they were. Some Pearls especially seem to garner high praise for even fine halftone work. What does seems obvious is that some presses, mostly older, use rollers and trucks of a different size and most newer presses use the same size. I don't think it matters in terms of the work produced, only in terms of what will work on a particular press, even the rational for these differences has been lost in the dim past. In any case, I will use 1 5/8" rollers with 1 3/4" trucks like the printer before me did for over 20 years and the printers before him did with this press.

Today at work I made a wooden base for the motor's speed control pedal that will attach to the right runner. I'll post a photo of it once it's installed. I'm pricing out rollers at this point. One quote I've had so far is about $450 for three rollers. OUCH! I've since recovered from the shock with only minor relapses and am pursuing my search further. I am hoping to find something in the $200 to $250 range. I'd even settled for a set of good, used rollers at this point. Hopefully I can get a set by the middle of January. They'll be rubber and I'm going to use the original cores that came with the press. Hopefully that will save a few bucks.

I have a few days of vacation tied in with the holidays and will probably lock up a cut, ink it with a brayer and pull a few impressions. I can't wait to be fully up and running and working on some projects. By the way, I'm looking for a spider chase, book chase, and skeleton chase if anyone has any for sale.
Saturday, December 20, 2008

It's Alive!

Just a brief and photo-less post to announce that the press is completely back together, clean, oiled and belted to the motor. I turned the switch on about 1 a.m. this morning and like the Miracle of Christmas it ran. This is my first experience with a variable speed press motor so I'm getting used to it slowly. But I had it turning at 15 impressions per minute without trouble, the speed I'm most comfortable with for now.

I still need to make a wood extension platform to attach to the right runner for the mechanical foot pedal that controls the motor speed but I'll do that Monday. I'll also post photos Monday along with the details of the final adventures I had getting things completed. Ahhh. I made my Christmas deadline. Now I just need some rollers! Anyone have any old but usable ones they'd like to donate to a poor printer? They need to be 1 5/8" diameter however. I'll explain that later.

Tuesday, December 16, 2008

Time To Rearm

The restoration of the press is coming along nicely. I told myself I wanted to have it running by Christmas and I think I'll meet that goal. I'm almost desperate to begin printing on it but for a while at least I'll have to take comfort in the old maxim: patience is a virtue. I need to get my roller cores recovered and I won't likely be able to do that until after the first of the year.

As you can see from the photos I'm at the point where I'm putting the arms back on. I had started cleaning, step by step working my way from the lower back of the base upward. I used my old standard cleaning supplies: 3M green pads; WD-40; rolls and rolls of cheap paper towels; 150 grit sandpaper; and elbow grease.

My goal is almost never to strip things down to bare metal and restore it to factory new. It's an antique and has years of working patina and character that I try to preserve as much as possible. That much being said, I remove all dirt, built-up oil deposits, rust, loose paint, etc. I file off all burrs and make sure all machined surfaces are ready to rub against one another again with only a layer of fresh oil between them. When I find something so worn as to affect seriously the operation of the machine I repair it or replace it. I readjust all settings as necessary.

All of these steps are important, perhaps the last more than any. Over the years modifications get made to machinery, some good and some bad. People who don't know any better make adjustments incorrectly or don't repair things that should be repaired because they don't know any thing's wrong. For example, on the right lower leg of the press bed where the shaft that connects it to the base goes through there is a threaded hole. This is for a bolt that tightens against the shaft so the shaft and the bed casting move together. I wouldn't have ever known this if the presses had not been disassembled and I wasn't thoroughly cleaning them which is when I discovered the hole and asked myself: what's this hole for? The bearing surfaces for this shaft are actually in the base where there are oil holes. But in both this press and my old 8x12 these bolts went missing sometime in the distant past and the holes were filled with crud (sorry for the technical term). This meant that the bed had moved on the shaft when the press was running, at least part of the time. There are no oil holes in the bed casting at these points so the shaft and journals in the bed would simply wear down no matter how much oil was put in the oil holes for this shaft in the base. So it pays to study about and thoroughly go over a machine: know your press.


The press was moved in pieces on different occasions, the bed coming first. It had been laid on a standard furniture dolly and I rolled it out of the back of my van onto my back porch and up through the French doors into the living room by myself. Did I mention it was heavy? It was heavy. The base I had help with and we used the usual 3/4" pipe method to get it off the truck following the same route into the house.

I started on the base and when that was done I pulled and slid it sideways onto more pipes so that it was lined up with the spot where it would finally rest. Then I rolled the bed behind it, cleaned the legs, bed face, and sides as well as the shaft. Then with a bit of heavy-duty fiddling got the holes lines up and pushed the shaft in. Using the heavy tie-down strap you see in the photo as a come-along I raised the bed high enough so that I could get under it enough to lift it up into place. Did I mention that it was heavy? It was heavy.

I tied the bed and base together as you can see in the photo for safety and then finished the cleaning. I made sure the press was lined up where I wanted it to go and then pushed/rolled it back to almost where you see it sitting now. I hadn't yet replaced the oil, grease, and dirt soaked original runners but did that next using some hickory we had laying round at work to make new ones (It's good to be a cabinetmaker). Using the scissor jack from my van and a 4x4 I lifted first one side and then the other, swapping the runners out. The I rolled the press back the rest of the way to where you see it in the photo. I then jacked up the back and removed a couple pipes and then did the same for the front. It ain't goin' anywhere now.

I'll leave the tie-down strap on until I get the drive shaft in and pinion gear and flywheel on. Though the side arms limit the movement, the drive train keeps the bed from simply flopping back. One more arm to go and then the drive shaft, etc.

I described all of this in some detail to show that there is no magic to doing this kind of work by yourself nor is the machine a living thing waiting to attack. Mechanical experience is definitely a plus but common sense goes a long way. You have to think and be careful but if you can't do that you shouldn't consider printing anyway since you're likely to lose some fingers. You also don't need to spend a lot of money or possibly any money to move a press and restore one. Except for the cleaning supplies, which were very inexpensive, it cost me nothing. I used short boards I had in the basement as ramps to get things from the van to the back porch and then up the stoop of the French doors. I also had several lengths of old 3/4" pipe from some pipe clamps but Home Depot has them cheap or perhaps a neighbor has some. The tie down strap I had from years ago from some other move. The jack came from my van. So if you're thinking of getting a press but the idea of moving it and setting it up intimidates you, ask some questions and use your head but you can do it!


Tuesday, December 9, 2008

Before and After

Here's a quick post to show some of the progress on the 10x15. There is almost no rust at all but a lot of the usual buildup of ink, grease, oil, dirt, sludge, glop, ick, slime, and what otherwise can make the press look bad and run worse. There was so much stiff syrup in the throw-off mechanism it was almost impossible to engage and disengage it. The press had sat idle for many years after regular use and everything just hardened up and turned to glue. But it's getting there.


Monday, November 24, 2008

De-pressing

It was a busy weekend and somewhat bittersweet. My old C&P 8x12 OS (1893) press was removed from the shop and hauled away to make room for my new C&P 10x15 OS (1892) that was brought into the shop the same day. I'm very happy to have gotten this press and it will be much more useful but the 8x12 was my first press, I spent a lot of time restoring it, and I liked it quite a bit. Sigh.

The weekend began Saturday morning (of course) when I drove with my friend Alan to northern New Jersey to pick up some presses and other print shop items. Alan does what he calls Letterpress Rescue as part of the Excelsior Press Museum. People cleaning out their parent's house or closing down their print shop often find Alan through his website and ask him if he can come and get their presses and equipment. Sometimes selling the items isn't an option for people and presses are often in the basement or even the attic where scrap metal dealers seldom venture. Instead of them going to the smelter, Alan adds the items to the museum shop or sells them so they will continue their useful lives and help fund the museum.

Thus we found ourselves hauling one C&P 8x12 NS out of a basement and a second out of the garage. In a shed there was some type in cases and about eight 5 gallon buckets of Linotype slugs, leads, and misc. heavy metal. Here's a bit of news: lead is heavy. Both presses had Kimble variable speed motors and were complete and in good shape, though in need of cleaning. Our adventure took the better part of the day and we got home (Alan to Baptistown and me to Milford, NJ) about 5:30.

Sunday morning we were off to the house of Alan's former print shop teacher in east-central New Jersey, a very nice man now 80 years old. Over the course of several weeks we had removed from his basement a C&P 10x15 OS, the press I am trading up to, two 1940/50's vintage Mutilith offset presses, a NuArc platemaker, Challenge paper cutter, type in cases and all the other detritus of a print shop. There was another Challenge electric cutter already in the garage along with a brand-new in the box Spinnet paper drill. Because we had prepped all this previously and had a rental truck with a hydraulic lift gate it didn't take us long to load up.
The next stop was my house where my 8x12 press was waiting on my back porch. On the truck it went and off came the 10x15 and right into the living room. Then back to Alan's shop where we unloaded everything and put it with the haul from Saturday. All in all it was a busy weekend. I plan to begin cleaning my new press this weekend and will hopefully have it running and printing by Christmas. I'm very anxious to move from setting up the shop to printing. The press is very nice and came with 6 chases, a Kimble variable speed motor, and a long and interesting history of job work.

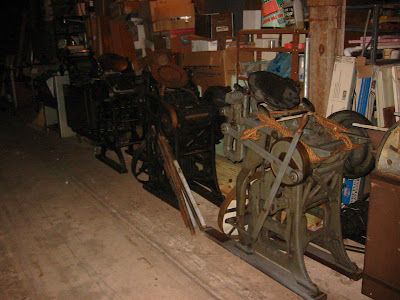
The first photo below shows the two NS presses in front of my OS press in the barn where Alan has his shop, all lined up like soldiers on parade. The second shows a closeup of my old press. The third shows the main frame of my new press after we got it into the living room, otherwise know as my shop. As you can see, it needs some cleaning.

Let me mention that the three 8x12 presses are for sale. I can give you particulars or you can write to Alan directly about specifics and prices through the Excelsior Press website, a link to which is at the right of this blog page. In addition, the two Multilith presses are for sale, one is for parts but the other is complete and running and there are many, many (did I say many?) accessories, blankets, an extra brand-new motor, etc. that go with it. Alan's teacher used it regularly and had large stocks of all needed supplies. Also, both Challenge paper cutters are for sale, they're complete and nice. The paper drill and platemaker with several boxes of new carbon rods and vacuum pump are also for sale. As for me, I'm getting some type, cuts, and ornaments.

So it's not so de-pressing after all, eh?


Soldiers On Parade


Should Old Acquaintance Be Forgot


New Kid On The Block

Friday, November 7, 2008

Rack 'Em Up


I was fortunate in getting several chases with my new 10x15 press. I kept my chases for the 8x12 in the old imposing table I have but the 10x15 chases are too big. So I decided to make a chase rack patterned after a few I've seen in 19th century photos and the ATF catalog from 1908. I didn't have much time this week for other projects but I was able to stay after work for an hour or so on Wednesday and knock out the rack you see in the photo.

It's made out of poplar and though intended for my 10x15 chases will also hold smaller or larger chases up to 12x18. The chase in the photo is for the 10x15. I chose poplar because it's light in weight but harder and stronger than pine and mills very well. It was a quick, easy project but very satisfying and I can't wait until the press is set up, the chases are in the rack, and I can start printing.

Tuesday, November 4, 2008

Composed And Standing Ready


Here is the finished, in every sense, composing stand after the third and final coat of shellac. You can see that I've cleaned the three front faces of the base cabinet and these match the top rather closely. I'm not going for an exact match but just don't want a glaring disparity. I'm still going to clean the inside areas to the left and right of the cases and the end panel. Once I do that they will look like the front faces and everything will be reasonably the same.

Besides the two ends of the bank there is a similar support in the center. Original base cabinets with these tops usually did not have flat tops and the banks were attached directly. I didn't want to remove the flat top so made the bank to fit over it. It rests on two cleats on the inside of the two end pieces. The top was no longer exactly flat after all these years so for the center support, where it rests on the top, I relieved the bottom so it only touches the back and front of the flat top. This prevents any rocking and the bank sits nice and flat on the top of the base.

Since this photo was taken, with my borrowed camera, I've put a lead and slug case at the upper left and started cutting more leads and slugs. I have another case in the main press room (otherwise known as the living room) but didn't want to rob Peter to pay Paul if I didn't have to.

Monday, November 3, 2008

E Pluribus Unum

The many separate parts you see in the photos, once joined back together in a perfect harmony of one, will be my newly acquired Chandler and Price 10 x 15 OS press, built in 1892. This is in fact a trade-in on my current C&P 8 x 12 of the same vintage. The 10 x 15 belonged to my friend Alan's former print shop teacher and since Alan's shop has a 10 x 15 but not a restored 8 x 12 we've swapped.

I had thought some day I would want a larger press so I could print larger forms and feel more comfortable doing some die cutting. But I had not intended to go out actively looking for some time as I'm still getting started on the 8 x 12. But this was a perfect opportunity and I'm very glad it came along. I'm very excited about getting it up and running. The only thing I'll need is new rollers as the original composition rollers are no longer any good.

You don't see the main body of the press because it's still sitting in the garage near the basement we hauled the press out of. Alan took some photos of this effort that he's going to post on his Excelsior Press website. But I'm getting started cleaning these parts so that in a few weeks when we get the rest of the contents of the shop with a big truck I'll have gotten a head start. Last night I managed to get the flywheel off the drive shaft. It was stuck pretty good but by drilling out the key I was able to do it. I also cleaned the feed and delivery boards and gave them a coat of shellac.

Shellac is a great finish. The original boards were finished with it and I used a rag and denatured alcohol to rub them down thereby removing the dirt from the finish while leaving the aged patina. A couple of coats of new shellac will make them as good as new as far as use goes but they will still have all the character of age. Shellac is made from the secretions of the Lac beetle in Southeast Asia (no, I'm not kidding) and has been a common furniture finish for a few hundred years. Usually amber in color (thus "orange" shellac) it is dissolved in denatured alcohol which acts as a vehicle to carry the pigment to the surface. Because the alcohol evaporates quickly you can often sand and re-coat with a half hour. It's an easy finish to use and repair. You can still get it at paint stores and even Home Depot.


Thursday, October 30, 2008

A Real Borderline Case


In between coats of shellac on my composing bank I've been cleaning out, sorting, and redistributing my borders and ornaments. I was very fortunate when I got my press and much of the equipment for my shop to get this border case will all kinds of borders, ornaments, fractions, etc. It was completely disorganized and filled with dust and dirt, but fortunately no type lice or corrosion.

The quality of this photo is much better than my usual because I borrowed a camera from work. If I would have composed the shot better I would have captured the other side of the case too which is also fairly full with different kinds of borders. But I'm just grateful for the clarity.

Monday, October 27, 2008

You Can Bank On It


I completed the bank top for my type cabinet tonight and brought it home from work. I still have to apply a finish to it which I'll start in a day or two. Normally I use orange shellac for anything I make that I want to match older furniture because that was the usual finish used. My Tracy cabinet is no different. But because in this case the bank is not just a separate piece of furniture but will be part of the old cabinet I will likely stain the bank first so that when I apply the shellac it will more closely match the patina of the base. I'm going to make some tests on scrap pieces before I decide.

The old cabinet is made out of ash and since we didn't have any at work, or any white oak that I liked and which would have been something of a match, I used some hickory which we did have. The grain is very similar and the darker color in some of the boards will aid in matching it to the older base.

I debated with myself over exactly what type of bank I wanted. One with the upper part elevated above the lower and taller so as to support a full-sized case or like the one I finally decided upon. I chose this style because I wanted a reasonably deep lower surface that would accept 3/4 cases which are often deeper than full-sized. Also, I know it will be extremely unlikely that I will ever need to have a separate upper case font above and a lower case font below. More useful will be to have a lead and slug case and perhaps a quad and space case on the upper level. This type was also less time consuming to build, a not altogether irrelevant consideration.

I made the lips at the front edges of the upper and lower levels 1/2" tall so case handles would clear and so they wouldn't interfere when I tie up a form on a galley. I will likely attach a small strip of wood to the lower right corner as a galley stop.

Once the finish is on I'll post another photo though it will probably be just as poor as this one. Hopefully I'll be buying a new camera in the next couple months.

Saturday, October 25, 2008

Cutting Out The Middleman

I've mentioned my friend Alan Runfeld and his Excelsior Press Museum previously and there is a link to the museum's website in the left column of this blog. He often receives donations and contributions of printing equipment for the museum. For the past several weeks I've been helping him clear out the basement print shop of his former high school print shop teacher. Some of the equipment will be incorporated into the museum but those things that would be doubles or even triples to what the museum already has will be sold to raise funds to help pay the museum's rent, electric bills, etc.

I thought I'd mention some of the items that will be coming up for sale shortly because as an amateur printer I'm always looking for things I still need for my shop and don't mind passing on a good tip. Perhaps I should point out that I have no personal interest one way or the other in any of these items or whether or not they sell other than a desire to help the museum. The museum has been of benefit to me as a printer and I know others who have also been helped by visiting the museum and taking part in its activities.

Now for the good stuff. Other items will be posted on the For Sale page of the museum's website but the three things I wanted to mention are two nice paper cutters and a paper drill. I don't remember details about the drill but it is brand-new and still in the box, never used. Both of the paper cutters were made by the Challenge Machine Company. One looks like it is from the 1940's and was made by Challenge for the Multigraph Company. It is a 19" manual cast iron tabletop cutter mounted to its original steel stand. There are a number of new wood cutting sticks with it and I believe an extra knife, as well as the original instruction manual. It is a very clean cutter and works great as I saw for myself when Alan's 80 year old shop teacher showed me a few things on it which was a real treat. It does have a safety release knob.

The second cutter is I believe from the 1980's but possibly even newer. It is also a 19" cutter but is a floor unit. The cast iron legs also make up the body where the knife holder, etc. is mounted. This is an electric cutter and is also in good working order. It has cutting sticks and possibly an extra knife as well. It has all sorts of safety features.

Alan will be posting complete information and pricing sometime soon but I just thought I'd mention them here. Please contact him directly if you're interested. Also, if you can possibly visit the museum please do so, it's a great place and Alan is very knowledgable and loves to teach. Maybe you'll even see me there!

Friday, October 10, 2008

Tiers Of Joy

Below is another in my Bad Photo series showing my new double-tiered Tracy type cabinet. It was made by Hamilton around the turn of the century. My type collection has grown surprisingly in the last year and another cabinet was necessary. This one holds 40 full-size cases and while a few spaces will be used immediately there will be plenty of room for new fonts!

I ran out of space in the living room so the second bedroom that I've been using as an office has become the latest part of the house to be taken over by the Front Room Press. It will still remain an office with my desk, etc. but I moved out a few bookcases and it will hold several print shop items including this cabinet.

I was off from work today so spent the time cleaning it up and getting it ready for cases. It originally had two case racks on top but if I can't find any I'm going to make a full-sized bank, copying an original. It's good to be a cabinetmaker!


Sunday, September 28, 2008

Proof Of The Resurrection

As can be seen by the incredibly bad photo from my old and indequate digital camera, I pulled a proof on my newly restored galley proof press of the Ludlow slug I made at my friend Alan's shop. That started a sudden urge to pull proofs on all sorts of cuts and standing forms to test out the press. I've very satisfied with the results. It does make a deep impression on the paper, sometimes the surrounding areas that got inked by the brayer get on the paper, and there is sometimes a bit of slurring. But considering that these presses were designed for proof-reading newspaper copy it does a very acceptable job. I'm happy to have it and plan on using it regularly. I suppose I could simply beat a proof off with a hand proofer but not only do I think this is better for larger forms but it's a lot more fun. It's also exciting using such a restored piece of history that must have proofed many a newspaper form over the years.


Saturday, September 20, 2008

Wheels Within Wheels

There's been a lot of discussion on Briar Press and the LETPRESS mailing list recently about operating a press safely. One of the important factors to consider is the speed of the press. Without a treadle or variable speed motor, running the press at a slow enough speed for safe operation, whether for a beginner or experienced pressman, is not always so straightforward.

To use my press for an example: It came from a print shop where the printer had over 50 years experience. The press had a 1725 rpm motor which gave 36 impressions per minute when belted to the 24" pulley on the drive shaft. Needless to say, this was much too fast for me and probably even for many experienced printers.

The press had no treadle and an expensive variable speed motor was financially put of the question. The answer was to slow the speed down by the use of an intermediate pulley arrangement known as a countershaft. By adjusting the diameter of the pulleys in this setup the speed of the press is adjusted up or down. In this case, the pulley on the motor is a 2" V-belt pulley which is belted to a 6" V-belt pulley on the countershaft. On the end of the shaft is a 2" flat belt pulley which in turn is belted to a 24" flat belt pulley on the press. The motor, 2" and 24" flat belt pulleys came with the press.

The photo below shows my countershaft. I was fortunate in having an old motor mount with a built-in countershaft but a similar setup could easily be made out of wood and with pillow blocks, a shaft, and pulleys purchased from an industrial supplier, flea market, etc. The wide pulley under the belt is an idler pulley to keep tension on the belt and help it wrap around the small pulley better and provide more surface contact. This is not essential but I had it laying in my basement and it works well. I made the base for it out of wood, the same as can be done for the main countershaft and motor mount.

I've read and been told that 14 impressions per minute is a good speed to start for a beginner, or even slower. My press runs at 15 ipm and as a beginner I'm very comfortable with that speed. I thought I would post this to show a less common but effective, inexpensive, and relatively simple option to run the press at a safe speed.


Monday, September 15, 2008

A Watched Ludlow Never Melts

I spent some time at the Excelsior Press today with my friend Alan. We changed the wiring on one of his Ludlows and then fired it up. While waiting the 50-some minutes it took for the full lead pot to melt the type metal Alan completed some of the work for local municipalities he's been doing since the 1970's: padding, perfing, numbering, cutting to size and boring holes in multi-part dog and cat licenses.

By the time that work was done the Ludlow was ready to go and we had some fun playing with mats and hot metal. I ended up with about a dozen Front Room Press slugs in 36 point Umbria. This may lead to a new Art-Deco motif for the Press...NOT! But it was a lot of fun and the slugs will be interesting to print.

We're going to cast and print specimen sheets and Alan will be starting a hot metal casting service. He has dozens of mats so has a great selection. Look for this soon at the Excelsior Press website, a link to which is in the left column of this Blog. I also should mention that Alan has some presses (including Kelsey's), type cabinets, furniture, and many other accessories for sale. Even some nice smaller -size planers I made at work; I'm a cabinetmaker in my real life. In particular he has several nice 2/3 size type cabinets available which are great for small spaces. All proceeds go to the Excelsior Press museum. Check out his website to see more.

Tuesday, September 2, 2008

If It's Not Baroque...

...you're not supposed to fix it. But since in my case it's Rococo I'm making an exception. I have a caps with figures font of 24 point Rococo, a late 19th century face. Unfortunately it has no P's or points. I'm interested in aquiring a complete font of caps, figures and points to beef mine up, or any combination thereof. If nothing else I'd at least like to get a few P's to complete what I have. If anyone can help please contact me. Below is a photo of some examples.


Simply DeVinne

The distribution of the American Bank Note Company type continues. The Comstock has been completed but unfortunately I only have three more empty California cases. Also, I need at least one triple cap and one double cap or two triple cap cases to complete the upper case fonts. I think I need about five more California cases for the full fonts remaining. But I'm getting there. Tonight the 18 point DeVinne Extended is on the schedule. Tomorrow the 30 and 36 point Bank Script.

I also spent time this weekend distributing some used Old English in 12, 18 and 24 point that my friend Alan Runfeld of the Excelsior Press generously gave me. I have Old English in 12, 14, 18, 24, 36, and 60 point so it's sort of the house face and these additional sorts beefed up their fonts nicely. I still have a 30 point to get which will add a new point size to the collection. I got the original 6 fonts from a print shop in Elizabeth, NJ that was cleaning out much of its letterpress operation.

I've been very fortunate in terms of getting good deals on used type. This has been a necessity considering my finacial situation. I'd encourage anyone who wants to be involvd with traditional printing and is in a similar situation to do as much study and research about the craft as you can and keep your eyes open. This will pay off by enabling you to understand what you need, what is good and what isn't, and what is a bargain and what is not. Roy Underhill of The Woodwright's Shop on PBS once said that luck is where opportunity and preparation meet.

Saturday, August 30, 2008

Comstock Load

No, I didn't lose my dictionary. I'm referring to the load of new-old-stock fonts of Comstock I picked up a little while back. They, and others, came from the American Bank Note Company printery in Philadelphia at the time they closed in the 90's. I was able to get them from a former employee.

There are 12, 14, 24, 24 Condensed, and 30 point caps fonts with figures and points and one 36 point complete upper and lower case font with points and figures. Lucky boy, eh? I spent a quiet evening yesterday distributing them. Thanks to my friend Alan I had a triple and a double caps case for the caps fonts.

Altogether I ended up with about 20 fonts. Other faces include Bank Script and Bank Gothic (go figure), Cheltenham Outline, Franklin Gothic, etc. plus a huge font of 6 point 20th Century Light. There were a number of outline style fonts that I attribute to the nature of the work they were doing with legal documents, certificates, etc. though that's an assumption.

I have more type than I have cases for right now. I know: boo-hoo poor me. I've never had new type before and it's a thrill and a lot of fun unwrapping it, untie-ing it on the galley, and then distributing it line by line. I also find it very relaxing. I'm saving the proofs that are glued to the top of the paper wrapping on each font. An extra bonus is all the 2 and 6 point lead and slug stock and some heavier slugs recovered from each package.


Monday, August 25, 2008

Rules Of Thumb...

...sometimes need clarification. In my last post I wrote that my rule of thumb when restoring old equipment is: less is more. Afterwards I realized that I was painting with too broad a brush. This rule is true as far as painting or refinishing in general goes. However, with any piece of equipment, from a stapler to a press, I invariably disassemble it, clean every part and make any repairs as I go. I remove any and all rust and while not a fanatic about polished metal surfaces, will at least make them bright.

Because my usual method of cleaning involves WD-40, green pads and paper towels original paint tends to stay put and I don't usually find a need to replace it or touch it up even if there isn't much left. But there are those cases such as the proof press where there are only bits and pieces of finish left and it was so rusty that sandblasting was the most reasonable method of cleaning. Complete repainting was therefore the only practical option.

So I hope I've set the record straight. I thought it important to do so because I'm a strong proponent of disassembling and cleaning machinery. Not only does it insure that it will operate the way it should because bearing and other surfaces are clean but you gain an intimate knowledge of the machine. You learn its strong points and areas where parts are worn and perhaps must be repaired, replaced or compensated for during operation. Trouble-shooting problems will be much easier if you know the machine inside and out. No machine is perfect, especially antiques, even when they're restored to full operation. I also find that being able to take pride in your equipment translates itself positively to your work.

I've attached a photo of a lead and slug cutter that was covered in rust on the bare metal surfaces but the paint of which was mostly intact. I took it all apart and cleaned everything including the screws, springs, and snap rings. I cleaned the gunk off the paint but otherwise left it alone. I made the base at work from some mahogany we had laying around.


Sunday, August 24, 2008

Press In A Blanket


Here is a poor photo from my inadequate camera of the restored proof press. The one I posted previously was taken by the man I got the press from. I've made a new door for it but I'm waiting for a reproduction latch before I mount it. Other than that it's ready to go.

The first step was to completely disassemble everything which was straightforward. I took it to work and sandblasted the castings. I also sanded the wood parts inside and out, removing the dirt, crud, and old paint. Some of the original paint remained on the wood but had been partly covered by the ubiquitous battleship gray. The wood was in good shape though there were a few interesting surprises, one being that while the bottom of the cabinets is pine, the rest is mahogany. As a cabinetmaker I didn't find that painting mahogany was odd as it has excellent rot resisting properties and is often used for exterior, painted millwork instead of cyprus. But I don't see why this characteristic would be desirable in this type of application. The factory may simply have had some in stock or gotten some at a good price. This happens in the shop I work in from time to time.

I wet-sanded the bed after sandblasting to polish it and the original milling marks showed up nicely. It's a bit pitted here and there but not to the point that it will affect its use, especially since the form to be proofed sits in a galley while using the press. I cleaned the cylinder by hand after removing the original felt blanket. I had some thoughts about trying to clean and reuse the blanket but finally decided it was too far gone. Once the cylinder was cleaned I put a new blanket on it, sewing it by hand like the original. You can see the seam in the photo.

The original color was a dark green similar to the Kelly Green I used here. My green is somewhat lighter and is more likely to have been used in the early 1890's if not the 1880's. I was only somewhat concerned with exactly duplicating the color. If money had been no object I would have gotten a color scan. In any case, it's very close and I like it. I brushed the paint on as I do with most of my machine restorations; it gives a thicker coat and is less messy.

I wanted to pull a proof with it but ran out of time. When I do I'll post a photo here. I'm pleased with the way it turned out and I'm happy to finally have the galley proof press I've wanted.

Saturday, August 23, 2008

Proof Press Project

Ah, the joys of alliteration.

Unfortunately I haven't been doing much printing as a result of press problems. I have a Chandler & Price 8x12 Old Style built in 1893. I need new rollers and new tires for my Morgan Expansion Trucks. I can print with what I have but the quality is spotty. But I should be able to take care of both issues by the end of the year, hopefully in time for Christmas so I can put out my first holiday card.

In the meantime there's never any lack of other projects in the shop. From cleaning type cases to distributing type and cleaning and organizing fonts of rule, etc. it's an ongoing project. I recently picked up a Chandler & Price galley proof press. Along with a few other things I've been working on this past week or so I've been restoring it to beauty and practical utility.

My entire shop pretty much consists of vintage equipment and accessories that do not date beyond about 1930. When cleaning or restoring antiques my general rule of thumb is: less is more. Even where more drastic measures are necessary I try and take a minimalist approach. Not only do I like the original, vintage look but also the wear and patina that is usually present. On the other hand, I don't consider rust to be a patina worthy of preservation.

The age of the proof press is roughly from 1890 to 1910 based on the style and remaining bits of paint color. The design of the stand seems to have changed at some point around 1910. But in any case, as can be seen from the photo below of the press as I received it, flood and tempest had taken their toll. The only option was a total restoration including repainting. I started last weekend: details on that in my next post.
Rust Never Sleeps

Friday, August 22, 2008

First Things First

I've had a website for my printing hobby since last Fall and a Blog associated with the website from the same provider that I've almost never used. The main reason I've rarely posted is the difficulty of going through the lengthy steps required to enter a post. So I've finally decided that, like the link on the website to my Flickr account where I easily post all my photos, I should do the same thing with a Blog. We'll see if the ease of posting here has a positive affect on the frequency of posts. Of course, like everyone else with a Blog I naturally assume that anything I have to post is so interesting to others that eventually this site will become a veritable Mecca of daily pilgrimage to read the pearls generated from this keyboard. Or perhaps not. But I would like to share what I'm doing with others and hopefully my adventures, trials, and trevails might prove interesting and helpful.

So, I've made my first post. Now we're cooking with gas, eh?