Tuesday, December 29, 2009

Playing Tag

I’m about 95% finished with restoring the Kelton intaglio press. Later I’ll post more about the adventure of cleaning and adjusting it, which turned out to be a bigger job than I had at first suspected. This was mostly because after it left its useful life as a working press it lay somewhere getting rusty before the next owner applied black paint to every surface whether it was dirty, rusty, greasy, or was supposed to be painted or not. They then used it for a display piece which is also what the next owner intended for it when he got a lobby. Since this lobby never materialized, I now own the press. The net result is that many things were frozen and a lot of paint had to be removed which revealed a lot of rust that had to be removed. In the end it was fine but time consuming.

Anyway, I was so anxious to try something I had never done before, namely intaglio printing, and so much wanted to see whether or not the press actually worked that I threw caution to the winds. After final adjustments Sunday afternoon I had things just together enough to pull a proof. The problem was that I had virtually nothing that one needs to do this; nothing proper that is. I had no intaglio ink, copper plate, tarlatan rag, hot plate, or blotting paper. And I had only watched some Youtube videos and read about the process in a few vintage books I downloaded free online. But fools rush in where angels fear to tread.

I did have a few scraps of felt and some 100% cotton paper however. Also some rubber base letterpress ink and a couple 2” diameter brass key ID tags that had been stamped with numbers. Into one of these I made some scratches to try the drypoint technique. The end results can be seen below. Keep in mind that I didn’t wipe off the (wrong) ink properly and that punched numbers are not the same as etching or engraving; also that I wet the paper too much and didn’t blot it properly; and top all of that the fact that I was rushing a bit to get it done after a long day. They may be some of the worst intaglio prints ever but in the above context didn’t come out too badly for some quick test prints. I certainly got a thrill from the “accomplishment” and the knowledge that the press actually worked. If you look closely you can see my backwards initials in the little scratched box in the second photo. These lines are extremely fine and it surprised me how well they showed up.


I’ll detail in another post the last stages of the restoration and have some photos of the restored press as well as a few more things I learned about it.

Sunday, December 13, 2009

Sign Of The Time

The time in this case is somewhere in the latter half of the 19th century. I found a little time capsule in the Kelton copper plate press today. But let me lay some groundwork.

Presses of this type, especially older ones, needed the lower roller adjusted to come into contact with the underside of the press bed. This was done quite simply using shims under the bronze bearing blocks. Any hard, stable material will do, thick and thin pieces being used as required. Wood and paper were sometimes used but these materials are dynamic, expanding or contracting with changes in the humidity, and therefore not the best. A possible exception would be oiled paper such as tympan that is both hard and stable. Steel, iron, copper, and brass were all more appropriate choices.

I had disassembled the Kelton as much as possible with the exception of the lower roller. I was able to remove the bearing blocks and shims but removing the roller itself would require taking the main frame completely apart. This wasn’t necessary as I could clean everything with the roller in place and supported by two pipes. I cleaned the bearing blocks today and the shims and it was here that I made my discovery.

The press has been moved at least four times in its life including from the factory to its first owner. Adjustment of the roller would have taken place after that first move and I think I know enough about the subsequent life of the press to state that no one has likely changed this initial adjustment. The roller is very heavy and holds the shims in place quite securely. By the time I got it the shims were pretty much glued in place as well with the gunk of the ages and the paint one of the previous owners had sloped on to make it shiny looking. Further examination bore out that they were certainly very old.

On both sides they consist of small steel plates, a few brass pieces of two different thicknesses, and on one side two pieces of oiled paper, possibly tympan. While the steel plates were for the most part unremarkable, one of them contained some evidence of the craft for which the press was intended. An example of this craft in action can be seen in the circa 1860 illustration below of the press room of the American Bank Note Company in New York City.


Copper and other plates used for intaglio printing have a bevel filed at the outer top edges, sometimes at a 45-degree angle but more often one less steep. The purpose of the bevel is to keep the otherwise sharp right angle of the edge from cutting into the paper under the great pressure exerted during printing. Anyone who has seen an intaglio print will likely remember that the edge of the plate is visible at the outside of the image. Even today plates do not come this way from the factory but the printer files the bevel himself. What I found on one of the steel shims was this hand-filed bevel.

The plate is 1/8” thick, a standard gauge for printing, and approximately 1 ¾” by 2” though not a perfect rectangle but a rather accurate parallelogram. As you can see from the photo, there are two holes drilled into it and it has numerous scratches in it. On one side the bevel is a fairly consistent 1/16” wide while on the reverse the edge has only been filed slightly, a distinct bevel but just enough to remove the sharp edge.


I can’t explain the reason why this small plate was prepared as if it was to be used for engraving or etching a print on it. Perhaps it was done for practice. Or perhaps when making a shim for the press the force of habit took over when removing the sharp burr at the edges. I do plan on reusing the original shims now that I’ve cleaned them and if further adjustments are needed simply adding to those. But I’m tempted to replace this one with a new piece of steel.

The stories this press could tell and in some ways is telling, eh?

Sunday, December 6, 2009

Look Out! Here Comes The Spider-Man.

If Peter Parker had wanted to be a print maker of a more ancient variety, he may very well have chosen intaglio as his medium. Had he done so he would have needed a copper plate press, sometimes called a spider-press because of its large spoked handwheel. I don’t spin webs of any size or catch thieves just like flies but I am in the process of restoring a vintage copper plate intaglio press. Eat your heart out, Spidey.

This press was built by the M. M. Kelton Company of Brooklyn, NY sometime from the 1850’s through the early 20th century. I haven’t been able to pin it down closer than that and have found little direct information on these presses. However, by doing a lot of internet research, piecing together tidbits of information including that gleaned form vintage photos and etchings, and disassembly and studying the press as part of its restoration, I’ve learned quite a bit. For one thing, this style of cast iron mass-produced press was used extensively by bank note companies as well as the U.S. Bureau of Engraving and Printing throughout the latter half of the 19th century. One of the largest users in my own area was the American Bank Note Company which had a printing house in Brooklyn, NY in addition to it’s headquarters in Manhattan. Brooklyn is of course where my press was made. Below is a photo of the ABNC’s now closed Brooklyn plant as it looks today.


Another photo shows these presses in operation and there are dozens, maybe hundreds of them churning out paper money, certificates, stamps, and all manner of financial documents. These presses were not designed for artists but for production. The top cylinder was in fact only a half-cylinder, its cross section appearing as a D-shape. The bed had a weight attached to the back that in conjunction with a pulley kept the bed in the forward position. When turning the handwheel an adjustable cam on the right side of the cylinder engaged with an adjustable mating cam on the bed which started the bed through the two (upper and lower) rollers automatically. Intaglio presses use three felt blankets laid over the paper and plate in order to cushion the pressure and press the paper into the incised plate to pick up the ink. On this press, the top blanket is attached to the top cylinder and a bar at the rear of the bed holds the other two blankets that extend along the bed under the upper cylinder.


Additionally, there is an iron frame above the press with a cross bar on which is a pulley. The blankets attached at the rear of the bed are held together at the front end where a rope is attached that goes over this pulley and on the end of which is a weight. When the press is at rest the bed is in its forward (start) position and the front end of the blankets are held up in the air out if the way so the plate and paper can be laid on the bed. Then the handwheel is turned, the bed is engaged and goes between the rollers making the print at which point it is automatically released merely by continuing to turn the handwheel. The bed automatically returns to its forward position and the blankets are automatically drawn up out of the way so the proof can be removed. Anyone who has operated an intaglio press will recognize the time saved with this arrangement. While not necessary for artist’s proofs, it’s a definite advantage for meeting production deadlines.


The press is not large but it is heavy. This is partly because the upper cylinder is solid, and even though the lower cylinder is a hollow casting it is very large and has thick walls as you would expect on an intaglio press because of the pressure exerted during printing. Modern presses have rollers about the same size top and bottom but it was common in the 19th century for the bottom roller to be much larger than the top as is the case here. Altogether the press weighs between 300 and 400 pounds, though that’s just an estimate. In practical terms it will print a plate up to 8” x 10”. The presses most recent use was as a display item in a print shop in Long Island City, i.e. Queens. It had been coated in black paint right over any dirt and rust so it would be nice and shiny. It needs to be completly cleaned and adjusted, the paint taken off where it shouldn't be, and some minor repairs made but otherwise nothing major. I suspect it came from the ABNC in Brooklyn when they closed that plant which is not too far away from its display post.


I have several letterpress printing projects that are a priority at the moment but I’ve begun the restoration process on this press and hope to be able to experiment within a month or so. I’ve never done intaglio before so it will be interesting. Besides limited edition proofs, I want to use it to produce artwork for my letterpress journal and also for artistamps that I can perforate on my Rosback perforator. I’ve seen some examples of work that is a combination of intaglio and letterpress so there are a lot of options, even if I don’t have radioactive blood.

Saturday, October 31, 2009

Good Vibrations

Many thanks go to David Lukens of the Lauchmen Printing Company in Lansdale, Pa. Dave very generously presented me with this paper jogger, a very nice 7” x 10” size perfect for most work. Dave has been a printer for years and years and is still hard at work doing what local print shops have always done: take care of his community’s basic printing needs. Schools, churches, businesses and individuals all make use of his skills and experience. While no longer doing letterpress work, he does all kinds of single and multi-color offset work (making his own plates), binding, folding, etc. His shop looks like a working print shop with cans of ink, paper of every description, boxes of envelopes, and all the misc. debris and brick-a-brac of printing laying about everywhere. While in some trades this is often considered a sign of sloppiness that is reflected in the work, such is most definitely not the case here. The work Dave produces is crisp and clean and he does this with easy efficiency. The old cry of “don’t clean it up or I won’t be able to find it” rings true here. The focus is on being productive and getting quality work out the door when customers want it and not maintaining a museum or laboratory environment. The proof is in the printing and Dave provides excellent work to happy customers.


A paper jogger is probably not one of the most needful things in a small shop, especially an amateur one like mine. But I do confess there have been times I’ve wished I had a way of more easily getting a nice even stack, especially when making pads. I happened to notice the wood table of the little jogger sticking out from among some debris on a bottom shelf while Dave was showing me around the shop and exclaimed, “Hey, what’s that under there?” Once pulled out it was obviously a jogger that Dave said he used to use but it hadn’t worked in a while. He then placed it in my hands and asked me if I wanted it.

Hmmm.

Once home I took it apart, cleaned it out, replaced the cracked and warped table, plugged it in and it was time to give it a workout. It was manufactured by the Syntron Company of Homer City, Pa. and is called the Syntron Paper Jogger, Type PJ4, Style 1763, Serial No. C8PJ65154. It has an on/off switch and a dial control to adjust the amount of vibration. The knob itself is missing and I’ll be picking up a replacement though it’s easy to adjust as it is. Based on the finish, construction and other little things I’m guessing the vintage to be 1930’s or 40’s. Syntron is now owned by FMC Technologies and is still making joggers today. I’m going to write to them to see if they can provide any information about mine from the serial number. But if anyone can narrow the date of my jogger down I’d appreciate it. Well, I’d write more but it’s time for my daily jog.

Sunday, October 25, 2009

Cinderella, She Seems So Easy; “It Takes One To Know One”, She Smiles.

Not too long ago I was reminded that not all stamps are postage stamps that pay for sending a letter from Point A to Point B. Some are in fact fantasy postage stamps, made up by someone to represent a fictional state, country, or protectorate. Some are made to advertise commercially or for non-profit organizations. Some promote various causes, groups, or anything at all. Some are simply ars gratia artis. In the worlds of art and craft they are commonly know as artistamps. Philatelically speaking such non-postage stamps are called Poster Stamps or Cinderellas.


The first postage stamps in the 19th century were printed in sheets and cut one singly with scissors or a knife. With the invention and marketing of the pin-hole perforator, separating them became much easier. Today postage stamps are self-adhesive and peel off a backer. But as I was reminded that not all stamps must comer from the Post Office and be used for postage, I was struck by the idea of letterpress printing my own stamps and perfing them. This is what I have in fact decided to do. I’ve done a bit of research and the consensus from those who do this kind of work with a printing press as opposed to an inkjet printer (which some do use) is that a cut should be made with anywhere from 4 to 12 images in the standard stamp sheet format. Here's a nice example from Rachel Scott at Fox Paw Press:

http://www.foxpawpress.com/Printshop/giftshop/artistamps/artistamps.html

All sorts of ideas come to mind and my first effort will be a simple Front Room Press stamp I can apply to envelopes or most anything. It will be a good opportunity to learn how to design something on the computer and have a plate made which I’ve never done. But even more fun will be to actually print and use them. This was a lot of my inspiration to get my perforator restored. Now it’s on to the next step. I’ll keep you posted.


Saturday, October 24, 2009

Holy Perforator!


The restoration of the perforator is complete and it actually works. Huzzah! Given the amount of rust and the condition of the punches it was no certain thing. For the most part cleaning was pretty straightforward if involved as described in my previous post. The punches and the holes they go in were the most tedious and troublesome part.


The perforator takes 365 punches about 1/32” diameter and 13/16” long. There are three parts that have holes for the punches: the punch holder, the stripper, and the die. So I had to clean out as best I could 1095 holes. I had soaked the parts repeatedly in WD40 after I finally got the punches out and after cleaning them completely I used one of the punches to scrape out the holes as much as possible. The last step here was pushing the punch through, wiping the WD40 off the far end, push it through again, wipe again, etc. until all of the extraneous WD40 was out. This actually worked pretty well and when I was done the punches all moved freely in the holes. The concern I really had was if they would go through freely when they had to pass through all three parts at once.

When these three parts were manufactured and the holes for the punches were bored they were clamped together in a jig and the holes bored through all three at the same time. The three parts were stamped with the same number so they could always be matched up. This is how alignment was always assured. Of course, a lot had happened to the perforator since it was new so it remained to be seen if this alignment remained.

I had picked up the replacement screws I needed and after the last one was replaced in the die I reassembled the stripper bar and its stiffener, reassembled the head, and then put the head back on the machine. I was almost done but looking at the punches I realized that I really needed to clean them down to bare, shiny metal and not leave them with any corrosion, no matter how minor. I was concerned about leaving them too long in the vinegar and salt bath because the surface of the metal becomes rough, if only mildly, and I wanted the smoothest surface possible to ease passage through the holes. What all this meant is that I would have to clean each punch one at a time. Fun, fun, fun.


Of the 365 punches the machine takes all had been present and I was able to recover 214 that were straight. There are perhaps 50 or so more that are only slightly bent and which I’m confident I can straighten out at some point and install. The complete row of punches is 24” long but even with only the 214 installed there are enough to perforate anything of a size I’m likely to need. I do plan on buying brand new punches in the near future because the ends on the old ones are not in the best shape and new punches will mean cleaner holes. But it punches good enough for any normal work, certainly not something the average person would notice.

Anyway, one by one using sandpaper I cleaned the punches, rolling them around with the tip of one finger on some chipboard while I sanded away with the other hand. I was careful not to sand in such a way to round over the edges on the working end of the punches but of course they weren’t perfect at this point anyway. This operation took episodes of Marcus Welby, Quincy, Kojak, Deal Or No Deal, the local news, two episodes of Judge Judy, Judge Joe Brown, and Ghost Whisperer to complete. Whew!

I installed the punches from the center of the head out so the pressure of the punching action would be centered. They went in better than I expected, with a few needing a slight helping hand from the tip of a screwdriver instead of my finger. I put oil on top of the stripper where the punches passed through and then started pumping the pedal. This was to break up remaining “stuff” in the holes and to lubricate things. I put some paper towels in harm’s way and stair-stepped my way to a cleaner, well-oiled perforator. I moved the paper towel with each step and it soaked up the excess “stuff” pretty well. It still leaves a slight residue on the top sheet but there is less each time and it works nice and smooth.

I had taken the tables to work to sand them with a pneumatic random orbit sander. This makes the work go fast and does a great job. The wood is cherry and was originally stained. Even though the tops of both tables had virtually no finish left it was intact on the underside and I found a match for it among some old cans of stain I had. I sanded enough to get rid of the dirt and paper that had been stuck to the wood when it had gotten wet, and to make everything smooth, but not enough to remove the patina. I stained it at home and then applied two coats of orange (amber) shellac, a traditional vintage topcoat. In the end I was surprised that the match was so close. I wasn’t worried about dents, bumps, chips, etc. because these tables have little affect on registration which is accomplished by the fences. Mostly the simply support the sheets.


Next time I’ll explain more about what I plan on doing with it besides the obvious, i.e. making holes. One thing I did realize is that because the holes are so small, this is a nice vintage option for general jobs requiring perfing instead of the more usual slit perf. The paper stays together well but tears very easily. And it won’t tear up the press rollers. Oh, boy!

Sunday, October 18, 2009

Stamp Act

I’m in the process of restoring a Rosback treadle-operated round-hole perforator circa 1920. It is 300 pounds of mostly cast iron with a 24” row of hundreds of tiny punches. Philatelically speaking it punches a perforation measurement of 12 which is, or rather was, the standard for U.S. stamps before 1914. Guess what I’ll be printing in the not too distant future? But more on that later.


While in generally good if typically dirty condition, the perforator had one serious problem: at one time it sat someplace where water was allowed to get onto the punch assembly. This assembly consists of three main parts besides said punches: the punch holder, the stripper, and the die. The punches are 13/16” long and a little over 1/32" diameter with a small head on one end like a brad. They drop into holes in the punch holder and down through the stripper bar. When the treadle is depressed the punches are pushed down through the stripper bar and into the die which has corresponding holes. Well, when stored at some point the head which carries the punch assembly was adjusted in such a way that the punches were pushed down below the bottom of the stripper. Add water, time, and neglect and presto! Rusted punches, punch carrier, stripper, and die plate. O joy!


Adding a bit to the sorrow is the fact that at some point someone with more physicality than patience tried to loosen the head and get the punches moving. To do this he inserted some kind of crow bar into the assembly and did what one does with a crow bar. While not loosening the punches it did have the affect of snapping the heads off four of the six screws by which the punch holder is attached to the head. His work apparently done, the perforator was left to get older. On the bright side the tables, while needing refinishing, are in good shape and it has both of its original fences with attachments. Also, it is not rusty to the same degree on all the punches.

Having disassembled and restored any number of antique machines in various degrees of decrepitude, I was reasonably certain that I could get it apart and that it could be cleaned and restored to use. The first step was to somehow get the punch assembly off the head and disassemble it. There was little point in cleaning anything else unless this could be accomplished. I sprayed on a liberal dose of PB Blaster “penetrating catalyst” and let it soak. I was prepared for a long process and this was the first step. Over the next three days I kept adding more Blaster and gently pried and tapped. No crow bar. During that time I was able to remove enough of the punches from both ends to get at the two bolts that hold the stripper bar to the bed. The stripper bar is attached to the bed and normally you can remove the entire head with the punches with the stripper bar remaining behind. But of course the punches were rusted to the bar. So in this case when I was finally able to lift off the head the stripper bar came with it.

Now I had access to the bottom of the stripper bar and after a couple more days of soaking I was able to tap the bottom of some of the punches to loosen them and pull them out. Just like pulling teeth, both descriptively and in terms of it being somewhat difficult. Keep in mind that there are literally hundreds of punches. I haven’t counted all of them yet but have got as far as 238. I got enough out finally to bend the stripper bar slightly and come at the screw heads of the last two screws holding the punch holder to the cast iron head using a right-angle screwdriver. More soaking and more tapping. It took a week but finally the last punch came out. Now all the parts needed to be cleaned down to original paint or bare metal. I don't like repainting unless absolutely necessary but I hate rust. I let the punches and some other parts soak overnight in a solution of vinegar and salt to loosen the rust up. Except for heavy rust this allows you to virtually wipe if off. In the process of removing the punches a number of them were bent or broken but I saved about 230 and I’m hoping they will work once clean. Replacements seem to be available from a couple sources and I’ve been in touch to get particulars. If the price is right I’ll replace them all and keep the old ones as spares.

Four screw heads had been broken off in the head and I had to drill out the remaining parts of the screw. I’ll pick up replacements at the hardware store. Cleaning itself was straight forward using WD-40; sandpaper; 3M green pads; a wire brush on a grinder and drill; and lots of paper towels. I’m not afraid to use sandpaper to get heavy rust off, stopping as soon as I get to bare metal. Then it’s the green pads and finally the wire wheel to make it nice. I used one of the old punches to clean out the inside of the hundreds of holes in the punch holder, stripper bar, and die plate. They weren’t that bad, the punches having provided some protection from direct exposure. But this part of the job was very tedious and cleaning the holes in the three parts took 5 hours. I did this in the evening while watching TV.

The main frame has been cleaned and the die plate reinstalled but for one screw that needs to be replaced. Once I get that screw and the others I need everything can be reassembled. At that point we’ll see if actually works. I hope to refinish the wood tables this week at work. More on that and what exactly I’ll be doing with it will wait for another post.

Thursday, October 1, 2009

Once Upon A Time


Old photographs and engravings conjure up feelings of nostalgia, historical interest, and rank curiosity. And they can often be a source of a surprising amount of practical information about the past, information that helps one gain real insight that goes beyond the superficial objects seen in the image. If we looks closely and carefully and where necessary take the time to do a little research to truly understand the snapshot of time that has been immortalized, we can make a tangible connection with those who have gone before us. Such a connection will enlighten our modern experiences and place them within a context in which their true meaning and worth can be grasped. Further, such an interaction with the past will give greater pleasure and satisfaction in those activities in which we take part in the present.

Take the above image as an example. It shows the press room of The Pictorial Drawing Room Companion circa 1858. Let's look at some of the things we can learn from this image that can help us understand better what the printing trade, the workplace, and society in general was like at that time.

First is the obvious. Even at this early date cylinder presses were actively at work. Even more so, the plant was steam-powered. Note the steam engine at the right which powered the presses. This place was very modern and they are making a point of letting people know it. Did you ever notice that pre-twentieth century factory buildings are long and narrow? This image shows why. Whether powered by water, steam, or later even electricity, machinery did not begin to have dedicated motors until the beginning of the twentieth century. Even then it took years for industry to fully change over. The single source of power must be distributed to the individual machines and this was accomplished by the line-shaft system as the image illustrates. The water wheel, steam engine, or whatever was connected to a main shaft that ran the length of the building. Because the machines, often different, had to be run at certain speeds, intermediate shafts with pulleys of different diameters were used to mechanically change the speed of the main shaft and deliver the correct speed to any given machine. The use of the line shaft dictated the architecture of the building. But it did even more.

These shafts were mounted to the ceiling and sometimes to the floor, by cast iron hangers in which were mounted bearings of a composition metal that was soft enough not to mar the steel shafts, hard enough to last many years, and that could be lubricated with oil and so allow the minimum of friction so the shafts could rotate freely. These were, and still are, the famous babbitt bearings, named for the inventor of the metal Isaac Babbitt. These bearings must have a regular supply of oil or friction will cause them to heat up, turn slower and even bind, causing damage and costly repairs.
Have you ever heard of grease monkeys? Ever wonder where that term came from? The means by which these bearings were kept oiled was through the labor of young boys who would climb into the rafters on a daily basis and oil each bearing. While the machines were running. And boys they were, even 9 and 10 year-olds. Why young boys? Their small size was an obvious advantage in tight quarters as was the small wage they could be paid. By the time they reached their early teens of course, they could start operating the machinery itself and start to really learn the trade. They're not seen in this image, but they and the social mores of the times are present nonetheless. Think of your 10 year old son going to work down at the steam-powered printing house every day for at least part of the day, including Saturdays, coming home all dirty like his father does from his own job. He gives you or perhaps his father his small wage every payday, helping meet the household expenses. Think of him climbing around, through, and over the moving shafts, pulleys, and machines, the flapping belts, 15 or 20 feet off the ground as he squirts oil into the small holes of the bearings. Are you getting a better understanding of the people and their lives at the time that image was printed?

Another interesting social aspect is in fact on view. Who do you see feeding the presses? Could it be...yes I think it is...women! This shouldn't really be a surprise, especially to letterpress printers who know even a little about the history of the craft. Women have long been associated with working presses. What makes this example a bit more interesting is that this is not a small family print shop or a forlorn western newspaper. Clearly they are well established working women in a large, for that time, printing operation employing dozens of workers at least. Just another day of work for the ladies of 1858. Eat your heart out, Rosie the Riveter.

There are any number of other things that can be gleaned from the now long forgotten steam-powered press room of the Pictorial Drawing Room Companion. See how many more you can spot for yourself. Get a feel for yesteryear that will help you understand tomorrow. Or today.

Saturday, September 26, 2009

What’s The Buzz?


I’ll tell you what’s happening: printing. Yes, after a period of high stress at work that hasn’t actually ended I’ve gotten myself in the swing of things again, cleaned up the shop, and got the press running. A number of projects are now back on track including the upcoming first issue of my journal, otherwise known as a ‘zine for you non-hipsters. And that bit of news leads me to the events of today.

Friend-of-mine and very creative and talented artist Rachael Faillace expresses herself in many ways and I highly recommend you check out her website to see for yourself: http://www.rachaelfaillace.com/. I want to include original artwork in my journal and I asked Rachael if she would contribute a linoleum block print. The idea was that she would provide the cut image and I would mount it type high and print it. That way I could incorporate the cut in one of the two-page forms. She very graciously agreed and the result appeared in my mailbox a few weeks later. She had been working in her garden one afternoon and the bees flying from flower to flower inspired her. As planned, I made a cherry base for it at work and mounted the cut.

Today I printed the cut for the first time and the result can be seen above and I really love it. This is the first time I’ve printed a linoleum block since elementary school. I know it’s a common practice to print them with a platen press but I had several concerns. One was over the ink. Block printing ink sold for this kind of printing is different from the rubber and oil base ink used for letterpress and I don’t have any and didn’t really want to buy any. I also wasn’t sure how the linoleum would handle the strength of the impression and thought I might find myself in limbo, printing too lightly but not being able to increase the impression for fear of damaging the linoleum.

Of course, as is so often the case with premeditated fears, they were unfounded in the event. In fact, the block printed surprisingly well, at least to my eyes. The image itself is about 2” x 2 1/2”. I decided on a yellow colored cover stock and it so happened I had some pre-cut scraps from a print shop I help clean out. I believe it’s about 80 pound stock. So the final sheet is 3 7/8” x 4 ½”. Remember: never turn down free paper.

I’ll describe my basic procedure in case that might be helpful to anyone. If I had a decent camera I’d have taken a few photos. Oh, well. First I got the dirty work out of the way and oiled and wiped down the press. Then I redressed the platen with a new top sheet. Except in very rare instances I always replace the top sheet for each job. That way I’m always sure it’s clean and flat. My tympan paper at .012” is thicker than what is most often sold today which is .006” thick. When I got my first press and most of the contents of an old print shop there was a partial roll and one new, unwrapped roll. I haven’t seen the need to get something thinner and it actually works very well as it holds any kind of gauge pin very firmly and lays flat and tight.

After that I went to the stone and locked up the cut using a spider chase to save a bit of time by using less furniture. I prefer using the chaser method of lockup as I think it’s more secure, especially with type. I snugged the quoins, planed the form, tightened the quoins the rest of the way. I checked to make sure they weren’t overly tight and had sprung the chase by trying to rock the chase from corner to corner. Finally, while not as critical as it would be with type, I checked for lift.

I put the rollers on the press, taking a chance by only using two for no other reason other than it would be one less to clean. I wiped a dab of ink, in this case Van Son rubber base black, across the ink disc with an ink spatula and then ran the press to distribute the ink. Then in went the chase and I pulled an impression on the top sheet. I always pull an impression on the top sheet for setting the gauge pins. I wipe the wet ink off with a rag and mineral spirits and then a bit of talcum powder (actually baby powder from the grocery store). It’s then very easy to measure out the margins directly on the top sheet and draw lines to place the gauge pins. I find this method to be fast and accurate. I laid out my margins by measuring the height and width of the image and the height and width of the paper. I subtracted the one from the other for each dimension and then divided by two. That gave me my top/bottom and side margins. I drew a line directly along the lower edge of the image on the top sheet and then did the same thing along the top edge of the image using a drafting square. Then I measured off the margins I had worked out and drew lines parallel to the first two the width of the margins apart. Those were the lines I would use to set my gauge pins.

I generally use McGill’s double-grip pins so after placing a sacrificial piece of pressboard under the top sheet I used a makeready knife (basically an X-Acto knife) to cut an approx. 1” slit. Then I inserted the pins, lined them up with the layout lines, and tightened them in place. I removed the sacrificial pressboard and placed a sheet of the stock I was going to print in the gauge pins. I use the sacrificial pressboard so I can easily press through the top sheet with the knife without damaging the pressboard in my packing which I reuse as many times as possible. Waste not; want not.

I set the grippers; in this case one would be able to hold down the right side but the left gripper had to stay to the outside of the far left gauge pin. So to help strip the sheet off the form I ran a rubber band between the grippers so it would lie across the top portion of the sheet in the margin area. Turning the flywheel by hand I cycled the press through slowly and pulled an impression on the test sheet. This also made sure that the packing was not too thick and showed me on the test print that I wouldn’t need to make any further adjustments. I adjusted the left gauge pin slightly and pulled another proof.

Thus did the printing commence.

Friday, July 31, 2009

Extra! Extra!

Let me first apologize as so often before because of the poor quality of the photos below. I'm left with the ancient Sony digital camera that records on 3 1/2" floppy discs. Enough said. But I figure they must still be worth at least 750 words.

I live in Hunterdon County in central New Jersey and while today there is only one local newspaper, the Hunterdon County Democrat, at one time there were a dozen or more papers published in many of the little towns that make up this area. The largest town in the county was and still is Flemington, today about a 45 minute drive north from Trenton.

Peter Haward was a teenage immigrant, later one of Flemington's leading citizens. In his diary for October 11, 1802 he recorded: "In Trenton I got the Newspapers at the Printing office, & left at sun-rise, rode to New Market & left a package at Benj. Johnson's, then at Price's tavern, arrived at Flemington at 11 o'clock, delivered packages there, had dinner, then to Pittstown, left papers there, then to Mr. Exton's, left one paper, then to John Maxwell's in Bethlehem [Pennsylvania], arriving about sun-set, left two packages of papers there, returned to Mr. Exton's, having ridden 48 miles."

The first local paper was the Hunterdon Gazette, originally The Hunterdon Gazette and Farmers' Advertiser. The first number was published on March 24, 1825. It was a one-sheet, four-page paper with four columns to the page. By the 1880's there were numerous competitors, many openly aligned politically as was common in the 19th century; some independent; some of a religious character; and even some amateur efforts like The Amateur Sun and others published by boys of the Jersey Blue Amateur Editors' Association. Another was The Jerseyman published by H.E. Deats who described his paper as "an Amateur Journal devoted to airing the pet opinions of the Editor and others."

One of the regular local papers was started in 1880, The Milford Leader. Living in Milford, NJ as I do, this paper has a special interest for me. The "Leader" was an independent paper meaning it was not aligned with a political party or local interest group, at least not in an overtly partisan nature. Most independents strove to give balanced coverage even as they maintained a character of their own given to them by their editors. The proprietor of the "Leader" in 1890 was George B. Corson and the editor Samuel H. Bast.

The Hunterdon Democrat, today the Hunterdon County Democrat, had its roots in the election of Andrew Jackson to the presidency. The Gazette was a Whiggish paper and most of New Jersey had gone with the democrats in the election of Jackson. So the county officeholders were determined to have a paper that would "hew to the official line". Over the course of the next 100 years many of the small local papers failed and the Democrat bought out the others. In 1949 they purchased the Frenchtown Star and the Milford Leader, merging them into the Delaware Valley News. The Democrat ceased publication of the News two years ago and is now the sole surviving local newspaper.

The photos below show the original press used to print the Milford Leader; a "turtle" used for transferring chases from stone to press; and the last issue of the Leader from 1949. Some other misc. bits and pieces of the printing trade are also present. All are on display in the foyer of the Democrat's office in Flemington.


Friday, July 17, 2009

A Family Affair


I love vintage photos of print shops and try to latch on to as many as I can. This is one that came my way while online this afternoon. I think it shows a family operation and I think my hunch is a reasonable one. The age of the three boys: young, older, and oldest; the presence of those who appear to be a father and mother of appropriate age to be the parents; and an older man who seems the right age to be the scion of the family. How likely is it that a group with those characteristics would be found working in a small shop. I think it likely that this is a newspaper office also doing the real money-making job work.

I'm particularly drawn by and attracted to this photo. One reason is for the apparent family relationship and that it therefore represents a not uncommon though seldom seen working scenario of that era. Another is that it shows regular, daily print shop activity including the accompanying work that goes on in any shop. The woman appears to be collating or otherwise sorting and stacking printed matter for some kind of jobbing work.

Unfortunately I don't have any information about where this photo was taken or the date, but based on the clothing, equipment, and facilities I'm thinking circa 1900-1920, possibly out west or in some rural area.

I wonder what ever became of them all...

Tuesday, July 14, 2009

Ship, Ahoy!

The mystery is no more. Of all things, it turns out that the cut is for an advertisement for the mast of a sailboat. Three respondents suggested this and two provided links.

The link with the most comparable information is here: http://www.dwyermast.com/items.asp?cat1ID=20&cat1Name=Masts&familyID=40&familyName=DM-6+Mast

Since the basement print shop was near Hartford, Conn. it makes sense that there would be something nautically related. But I never would have figured out it was the cross section of a mast. And the text is not just random filler but the the arcane specifications for such a thing.

Now, how to use it...

Saturday, July 11, 2009

Cut It Out!

I have a mystery cut that I recently acquired. It was packaged well in paper and looks to be unused. The use it may have served is a mystery to me. The "border" does not look like anything that I have reference to and the text is equally mysterious. My guess is something to do with sports or fishing. Because the cut appears to have come from the manufacturer and never been opened I'm assuming the text is related to it's use, but perhaps is just a bizarre filler. It consists of Lino slugs and 2 pt leads and 6 pt slugs for spacing. It is slightly snug but not tight enough for a lockup. It would need another lead or some other means of wedging it a bit tighter. If anyone can provide some insight I would really appreciate it.


The text reads as follows:


P-5 BARRACUDA

Length 4.25

Width 3.00

Wall 0.95

lxx 2.10 in. 4

lyy 1.23 in. 4


Friday, July 10, 2009

The Return Of The Native

Well, it's been one of those months when not much has gotten done around the shop in terms of printing, my day job has been extremely stressful and tiring, and so finding a real need to relax I helped some friends move thousands of pounds of iron, wood, and lead. Oh, yeah.

The first such adventure was helping my friend Sarah Smith of Smith Letterpress move her recently acquired C&P 8x12 press, a Challenge paper cutter, imposing stone and bench, and misc. items from Alan Runfeldt's Excelsior Press in Frenchtown, NJ to Long Island on a Saturday the second week in June. Interestingly enough, this paarticular press was my first press which, as readers of this blog may remember, I traded for a 10x15 last Fall. I can't say how happy I am that Sarah now has this press.

The day started out fine as we used a small U-Haul box truck with a pullout ramp to move everything. It looked like we might avoid the rain but no, after traversing the Lincoln Tunnel, Manhattan, and Queens, we ran into some wetness just before arriving on the north shore of the "Big Island". It was then we found out that the layout was not quite what we had thought and the truck had to be parked somewhat further away from the storm cellar entrance than we had anticipated. But we had come well prepared with plywood and 2x6's and as you will see from the photos. Good thing we had recently watched Bridge on the River Kwai.

Photos are posted here: http://picasaweb.google.com/funkedude/PressMove?feat=directlink

When all was safely in the basement we were treated by Sarah's very gracious, easy-going and companionable parents to massive, juicy, marinated and delicious BBQ'd steaks and accessories. I took advantage of an offer by Sarah's mom and took an outdoor shower that was extremely refreshing. We sweated and we grunted and we ate, and then we had a long drive back home. All in all it was a very satisfying and enjoyable adventure.

Adventure No. 2 started on Friday morning the 24th about 9:30 and ended Saturday morning about 5:15. The mission was to travel to Clinton, Conn. and retrieve a Heidelberg platen press, a Golding jobber, a paper cutter, cabinets of type and galleys, and misc. treasures. The shop was once owned and run out of the basement of Alan Duran who began printing privately about 30 years ago. He recently passed away and the house is being sold. His son and grandson wanted his equipment to go to people who would preserve and use it and carry on Mr. Duran's legacy. They contacted my friend Alan Runfeldt of the Excelsior Press who in turn found a man in West Virginia looking for a Heidelberg. It was arranged that he would come up with a trailer and pick Alan and I up and then continue on to Conn. where we would pick up the equipment. We would stop back at Alan's shop and unload everything but the Heidelberg which would continue on to its new home father south. Alan will make the other equipment available for sale to help others building their shops and provide funds for his Excelsior Press museum.

Here are photos of that move: http://www.flickr.com/photos/shawfamilypublishing/sets/72157620540304943/

Fortunately the shop was in a basement that was at garage level and we only had to demolish a short section of wall to make room to get everything out. The wall was somewhat makeshift and will be easy to replace if necessary. Once again there was plenty of rain and we just missed a tornado. But though extremely tiring and taking nearly 24 hours from start to finish, it turned out well and we all have a few more things for our shops and to pass on to others. Mr. Duran's family was very personable, only to be expected of members of a Bluegrass band of course, and provided labor, coffee, pizza, and plenty of moral support. I even got a vintage oscillating fan from the garage sale pile for my shop!

All in all it was an eventful month even it it did keep me out of the shop. Now it's on to pending projects.

Saturday, June 6, 2009

Spooling Around

All right, that's perhaps the worst heading ever but since it's for a relatively unnecessary post, it's actually appropriate. I just wanted to put up a photo of the label on the spool of stitching wire that came with the stitcher. It's a wooden spool and the vintage label is pretty interesting. The label has the imprint of the manufacturer who made the stitcher but while gluing it back on I noticed that it had actually been placed over the original label. I couldn't see enough to determine the manufacturer of the wire.

BTW, I'm still looking for some additional spools, partial or full, wood or plastic, whatever gauge. I know I can buy them new but this poor printer is hoping to save some money if possible.

Tuesday, June 2, 2009

Wired!

Many thanks to my friend Alan Runfeldt of the Excelsior Press for having numerous printer's supply catalogs laying around and allowing me to borrow them. In two I found ads for my No. 8 National wire stitcher.

The top scan is from the circa 1950's New York Type Distributors catalog. They were located at 579 Broadway in New York City: just phone Canal 6-6767.

The second scan is from the Zimmer Printer's Supply catalog from 1969. Their main office was at 225 Varick St. in New York City with a sales office in Boston and an executive office in Hawthorne, New Jersey. Orders can be placed by cable using the code: Zimsupco

Don't you just love old catalogs? The information in these two ads tells me virtually everything I need to know regarding the stitcher. Capacity, speed, and clear enough graphics to allow me to reconstruct accurately the table gauge. Fortunately one of the end slides was still attached so I can use it for scale and general construction.

I now need some wire. If anyone has any 5 pound spools of wire they don't need, aren't using, or wish to donate please let me know. Older wooden spools are especially welcome!


Friday, May 22, 2009

A Stitch In Time

I've been on a slight hiatus from posting because I've been without a computer at home for about three weeks. I had an ancient 366 mhz unit that I've exchanged for a less ancient Pentium III at about 800 mhz. I still have dialup so dowloading, etc. is as slow as before, but aside from that I'm cookin' with gas. And it doesn't lock up every few websites. And it has Windows 2000 and Corel Draw, and it's the best thing since sliced bread. Now I'm loking into DSL. Yep, I'm moving right into the 90's.

Anyway, in honor of the first post since my return, I have a nice new addition to the shop to introduce, a National wire stitcher. While I don't plan on doing thousands of binding jobs of my own work, I will do some and want to have the option of doing binding for others on a paying basis. Besides, it's a cool machine and I love machines and because I only paid $50 for it and picked it up locally, I indulged myself.

I picked it up today and while I wasn't surprised by its overall dimensions which were about what I expected, I didn't realize it was so beefy. It's made of heavy castings and is very substantial. I still need to look into its particular specifications, but it certainly looks heavy enough to bind up to at least an inch thick as opposed to the smaller, lighter models.

It was made by the Gitzendanner-Muller Co., Inc. of New York, NY. It's their National Wire Stitcher, Size #8, serial number 1325. There is a supplier's tag on it as well showing that it was sold by the E.P. Lawson Co. Inc. of 426 W. 33rd St., New York 1, NY. The tag indicates they sold paper cutting machines and binding equipment and probably a lot of other things related to printing.

I'm estimating it is from the 30's. This is based on the paint color, style of the maker's and seller's tags, etc. The "New York 1, NY" will be a clue that I have yet to look into. It had a wooden wire spool with some 28 guage wire installed. The spool had a paper label from the same company as the maker of the stitcher but because the label was partly falling off and partly damaged I was able to see that it had been glued over a label from the actual maker of the wire. This is not uncommon as for example Martin guitar strings are sold in Martin packaging but are actually made by a company that makes strings as their main business. I wish stitching wire sold today still came on wooden spools instead of ugly, bright colored plastic. I repired the lbel and reattached it to the spool. Gotta love that wooden spool.

The stitcher is dirty with minor rust on some exposed parts but otherwise seems complete and cycled through when I turned it by hand. I need to replace the cord. If anyone could provide me with scanned catalog pages, instructions, or any other information on this particular stitcher or a similar stitcher I would really appreciate it. I'm pretty good mechanically but am flying blind with this machine.

The photos below were taken by the man I bought it from and aren't so good. I'll take some better ones and post them later.

Tuesday, April 21, 2009

"You may fire when you are ready, Gridley."

This is about my first broadside and my first-time participation in a letterpress swap. In the spirit of Commodore Dewey, the printing of this innocuous sheet was something of an epic battle. Before the swap was a glimmer in any one's eye, about a year ago I decided I would try and print one of my favorite poems as a broadside. That was back when I had my C&P 8x12 with the poor rollers and worse Morgan Expansion truck tires. It was the first form of any length I had set.


My concept was to create a broadside in the style of the 17th century following examples I had seen. Thus the black letter Old English text and the Caslon title. The border was not exactly in a style of that age but was the closest I had. I picked a Strathmore all-cotton laid paper I got with the press along with most of the original equipment for my shop.


A number of problems cropped up right away, things that had not been so evident on the small forms I had printed to that point such as a business card. First was the roller and truck issue as it affected inking the form. The perf cuts in the rollers were bad at one place and created a white line that moved around slightly. The truck tires being out of round caused their own difficulties. And to add insult to injury I realized that the platen I had so carefully adjusted needed tweaking. I could deal with the platen but had to live with the rollers and trucks for the time being, not being able to afford replacements. The texture of the laid paper did not help. But for all of those things, it ironically still printed as good as some of the cheap and quickly printed originals I've seen. It was certainly readable, if no acme of the printer's art.


Fast forward to the present day and the advent of my great 10x15 press with good rollers and steel trucks. Now you would think hey, now we're cooking with gas, right? Well, sort of. Everything certainly went much better and the print was far superior. But the fly in the ointment was that I had taped the rails to get the rollers adjusted and had been pretty happy with the business cards I had done but I should really have taken more time to experiment. I had signed up for a great letterpress swap (letterpressswap.blogspot.com) and was pressed for time (no pun intended) so even though they did not come out as well as I would have liked and as the press is capable, they're OK.


What I needed to do and have subsequently done is to remove a couple layers of tape from each rail so the rollers would press a bit more into the form. Once I did that I got great inking and nice prints without makeready using the same form. Not that it couldn't have used a touch of makeready here and there to really get it just right. The type was a bit worn and though I replaced a number of sorts it could have used a little onionskin here and there. So the moral of this story is to take your time and go the extra mile.


As my first real project I was reasonably satisfied and I learned a good deal more about what constitutes basic adjustments. You can see the results for yourself below. Wild exclamations of approbation and constructive criticisms are welcome.


Thursday, April 16, 2009

Hooked On Wingnuts

In my last post I neglected to explain that the screw hooks are fixed to the bottom board with nuts and washers, the nuts on the bottom being countersunk into the board so the bottom board sits flat on the base. The screw hooks in the top board are loose in their holes and each has a washer and wingnut. Once the top board is laid on the stack of pads each length of chain is attached to the hooks in the top and bottom boards with as little slack as possible. The stack is then compressed by tightening the wingnuts evenly on both sides.

Now go and do thou likewise!

Monday, April 13, 2009

A Pressing Issue

I make up my notepads using a padding press and padding cement. These presses come in various shapes, sizes, and types of construction but they all do basically the same thing: compress the stacked pads so the flexible padding cement can be applied and so that the pads will maintain a compact form and the sheets hold together well once released and cut apart for use.

I made my own press modeling it on a style once commonly available from most printing supply houses and still available in one form or another, even on Ebay. The biggest difference is that I made mine from scrap lumber and plywood and it cost me nothing but time and a couple bucks for the two pieces of chain and the screw hooks.

The press consists of a base, a removable vertical backboard, a bottom board and a top board. You can see most of these parts in the photo. The photo is from last year and shows my original pads. To use it you stand the backboard on the base and lay the bottom board on the base. After first folding the edge of a sheet of index and laying it on the bottom board, you take a stack or stacks of pads (whatever will fit depending on the size of the press or pads) and place them on the bottom board with the top of the pads against the backboard. The pads of course have already been made up by interspersing a piece of chipboard alternately between the number of sheets each pad will have. You jog the stack so it is nice and square and the sheets are even all around. Then another sheet of index is folded and laid on top of the pads after which the top board is put on, the chains connected to the screw hooks, and the wing nuts tightened to squeeze the stack of pads. How much they should be squeezed depends on how tall the stack is but there's a lot of "that seems about right" involved.

The top and bottom boards with the pads in between can then be lifted up as one unit and turned around on the base so that the tops of the stacked pads are facing you. The sheets of index can be folded up and down out of the way. They are there to prevent padding cement from getting all over the boards.

As might be expected from the name, padding cement is a special adhesive used for pads. It is sort of rubber-like when it dries and I'm sure everyone has used a pad at one time or another and so is at least familiar with it in a user's sense. It can be purchased from printer's supply houses, art suppliers, etc. It's available in a few colors though white seems to be the most common. The cement I have is water-based and I just take a cheap brush and paint on the cement making sure to work it in well so I don't miss any spots. I let it dry and then put on a second coat. Most people probably use just one coat but I like two for strength. Another way to strengthen the top is to press cheesecloth over the first coat while it is wet and then paint on a second coat.

In a pinch, the pads can be stacked on the edge of a table and a brick or two laid on top to prepare for the cement. This is the method given in an older graphic arts textbook I have. But I like the surety and stability of the press.

Once the cement is completely dry (I leave it overnight) I cut the pads apart with a wide-bladed knife. There's a bit of a technique to this which is easily learned by doing it a few times and after which you can slice them up like butta.

Pads are easy, cheap, and a great project and always seem to be a big hit with everyone I give them to. Obviously they can also be used in business-like ways for advertising, etc. I would only add that you need a lot of sheets to make them. I printed almost 600 sheets on my last pad project which yielded 17 pads of about 35 sheets each. So you Vandercook users may want to pay a visit to your friend's motorized platen press. Heidelburg owners are in luck.

Sunday, April 5, 2009

Noteworthy

I finished the run for the new pad sheets today, about 600 in all. That's the longest print run I've done to date and it went very well. Among other things, doing some of these mundane print projects gives a lot of practise feeding the press. If I haven't mentioned it before, I run the press at 14 impressions per minute which is very comfortable for me. The experiment of leaving the Van Son rubber base ink on the press overnight was successful also. I know this is "common knowledge" but it's nice to have it verified by my own experience. The top photo shows my first pads which I printed on my old 8x12 about a year ago. The bottom photo shows the revised heading. I not only like that heading better but they printed somewhat better as well, though I'm not sure how much of the difference can be seen in the scans. I'll be gluing them up in the next day or two. It's a simple and fun project and besides the potential advertising value they make great gifts and are useful to have around. I made them using offset paper cut offs so they basically cost me only my time. The faces are Old English, Caslon, and Stymie.


Saturday, April 4, 2009

Saturday Night’s Alright For Printing

While working on several larger projects still in the design stage I’ve been printing some more mundane items. I ran off some more business cards and this evening I reset the form for the heading on my notepads and started printing them. I’ll finish the run tomorrow and then start gluing them up.

I thought I would record how I did these, which will show my usual procedure for setting the gauge pins and grippers, among other things. I have been forced to return to the use of my vintage digital camera so please excuse the poor quality of the photos.

The first photo shows the locked up form in the press. I invariably use the chaser method as shown. Because these pads are basically the same as printing a letterhead, the head of the form is at the bottom of the chase and slightly below center. This will allow better inking of the form and more even pressure. The pads are 5” x 8” and about 1” of the sheet stuck out the top of the platen.


The second photo shows the topsheet after the gauge pins have been set. Note that I like to use the McGill double-grip pins, as they are not only easy to set but easy to adjust. I’ve used the spring type before and have a few other kinds including the quad type for certain circumstances. I’m also fortunate in having a set of McGill extension gauge pins which hang off the lower bail, extending below the platen and thereby allowing especially large sheets to be held and printed.

Once my basic packing is set I usually pull an impression on the topsheet using a piece of old-style carbon paper. Normally ink would be used but I’ve found that I’m usually not printing on the same day I’m dressing the platen and getting things ready for a print run. So the carbon paper let’s me print on the topsheet without inking up the press. For those times when I am printing the same day, I pull an impression with ink and then wipe the ink off with a rag and mineral spirits, drying it with baby powder.

The print looks a little light in the photo but the entire form is actually visible. Using a line gauge I drew a line across top of the form. Using a drafting triangle along that line I drew the other line along the left side of the print. I had determined on a layout sheet what margins I wanted and so measured out that distance at two points along each of those two initial lines. Then I drew lines connecting those marks as shown. Then I attached the gauge pins to the top sheet. The double-grip pins require a single slit in the paper to insert the tongue that I cut with a make ready knife. To avoid damaging the pressboard, which I reuse as many times as possible, I inserted under the topsheet an old pressboard saved for just this purpose. Once the cuts are made I remove that board and set the pins as you can see in the photo. Using a sheet of the same stock I’m going to use for the run I take a trial impression, check the margins, and adjust the gauge pins accordingly.


The third photo shows the setup for the grippers. I set the right gripper so it would cover the right side of the sheet and the left gripper far enough over to put some stretch into the rubber bands and generally keep out of the way. I used two rubber bands stretched between the grippers, one at about the center of the sheet and one towards the bottom, i.e. the top of the platen. In combination with the gripper tongues, this proved to work fine.


The fourth photo shows the delivery board towards the end of the run with some of the printed sheets. It also shows a magnifying glass and four rubber fingertips. I kept an eye on the prints and noted when they seemed to print lightly. I then threw off the impression and looked at the print with the glass. Usually my eyesight was proven correct and I had to add some ink to the press. I got the fingertips from Staples and use them in place of the traditional glycerin and/or sandpaper rubber-banded to the fingertips. I put one on the index and middle finger of each hand. They really work great. You can move sheets around with a very light touch and help keep the sheets clean.


The last photo is simply an overall view of the press after I finished the run. I still have about 300 more to do but will wait until tomorrow. This is also an experiment since I’ve left the Van Son rubber-base ink on the press. I’ve never done this before and tried to print the next day though it’s supposed to be OK. We’ll see.


Once the sheets dry I’ll scan a good copy and show you the results. By the way, note the long ink fountain on the press. I finally got this cleaned up and mounted. I’ll take better photos and post them another time.

Saturday, March 28, 2009

Charting A New Course

Some people mentioned that they might be able to help identify the cut shown in my last post but that the photo was too indistinct to make out, and it's certainly no model of the scanner's art. So since this afternoon I printed some business cards I decided to pull a proof of it. This is the largest form I've printed and it almost filled the chase. I didn't go crazy with any makeready, just adjusted the packing and used a few sheets for an underlay to get the somewhat respectable print you see below. So hopefully this new scan of an actual print will be of some help in understanding exactly what I have. I'd certainly appreciate any insight.


Friday, March 27, 2009

You Can Count On It

I recently picked up the cut in the photo below. It is 7 1/4" x 12" and the numbers run from 1 to 500 starting in the upper left hand corner and across the row to the right, continuing back to the left side and across to the right in the second row, etc. My guess is that this is for some kind of counting sheet: one checks off the numbers on the sheet as one counts whatever one needs to count then, when the last item is counted, the total is self-evident. I would really appreciate any input either to confirm or deny my own suspicion and/or provide the definitive answer. I'm counting on you...


Monday, March 16, 2009

It Ain’t Over ‘til It’s Over

A week ago last Sunday I printed my first real project. It was for a letterpress swap and only ran to about 75 sheets but was the first thing I’ve printed in “bulk” for distribution. Everything came out reasonably well and I was very happy with the way the press worked. During this process I learned, or perhaps was reminded of something, I thought I’d share here.

I made a previous post describing how I adjusted the platen on my press at the time I restored it. I adjusted it at all four corners using a machinist’s gauge and I spent considerable time loosing and tightening the platen bolts until everything was set to the gauge. And in fact when I printed a small business card form, it was just fine.

When dressing the platen and before inking the press my practice has been to use a sheet of the old-style dark blue/purple “carbon” paper with a test sheet to pull a proof, turning the flywheel over by hand while holding the two sheets between the platen and the form. Once I’m sure everything is where it should be I ink the press and pull an impression on the tympan that I then use to set the gauge pins following the usual procedure.

The form for my project had a printed area of about 4” x 6”. I had locked it up in the chase slightly below the centerline as is normally recommended. When I pulled the proof using the carbon the impression, while generally even, was lighter at the top than the bottom. For a second I was surprised considering the care I had used setting the platen. But then I realized that an actual form introduces a variable and especially the size of the form.

The answer was to adjust the top two platen bolts very, very slightly to move the top of the platen towards the bed. I then took a trial impression and made another very small adjustment until the impression was truly equal. In fact, the impression was so good that I didn’t feel I needed makeready and so proceeded with the run. Looking back I think there were one or two things I would have spotted-up but in general I was satisfied with the impression. I saved my proofs and will scan them and a copy of the final print and post them tomorrow when I have more time.

So while gauges provide a useful starting point the proof, as always, is in the printing.


Followup: Just to be clear, once I get the platen properly set, and I'm hoping that has now been achieved, I don't expect to have to adjust it again except in extraordinary circumstances. But having recently disassembled, cleaned, reassembled and initially adjusted everything, I'm not surprised it required a bit more tweeking.

The usual means of adjusting the platen is to lock up either four large sorts, one in each corner, or a foundry type border all around the edge of the chase. Then test proofs are taken on the tympan and adjustments made accordingly. I have nothing against that method but when I tried it on my old 8x12 I personally didn't have much success. When I made the adjustment with the method I've also now used on my 10x15 things worked out very well.

Tuesday, March 3, 2009

Foiled Again!

I've given some thought from time to time about the possibilities of hot foil printing, especially in relationship to book covers and the like. But this was a passive interest only until a couple weeks ago when I had the opportunity to pick up a vintage hot foil press that was otherwise destined for the scrap yard. It needs a good cleaning but I've fired it up and tried it out with the included burgundy tape and it works just fine. The two "idler" bars on the automatic feeder that stretch the tape between them and keep it at the right distance from the type were missing but an old catalog showed that they were simply 5/16" diameter round metal rod. I bought a length from the local hardware store and bent it to the right shape and now you can't tell the difference from the factory originals. The hand wheel that moves the upper arm was broken and I replaced it with a vintage part from my old parts pile in the basement. Only the cleaning remains.

The type holder holds forms up to 1" wide and 5 3/4" long. It's actually a rather large machine. The table is 12" x 12" and it weighs a good hundred pounds or so, about the size of a large tabletop drill press. Foil tape seems amazingly low priced so I'll have to pick up some gold and a few other colors. So the Front Room Press has become a bit more diversified in what it can do. Anyone need your name on a book? If anyone has any information on this company or press, I'd be very grateful if you'd get in touch.


Friday, February 20, 2009

GO NAVY!


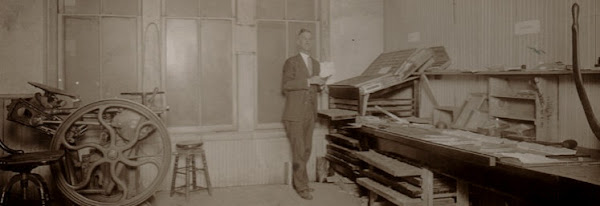
Anyone who has checked out my website will know that of the three print shops from which the majority of my shop's equipment comes, one is Na-Vet Printing of Elizabeth, NJ. This great shop was started in 1946 by Lawrence Franchini, appropriately enough a Navy veteran of the war. That's him in the photo above in 1949. Every kind of work traditionally done by a local printer was done in this shop. From tickets for fraternal organizations; handouts for politicians; school and church programs; business cards and stationery; etc.; all of this and more was turned out in support of the community. While Mr. Franchini is no longer with us, the business continues to serve not only the Elizabeth area but an ever increasing sphere in New Jersey and New York thanks to many modern innovations introduced by his son Larry, the current owner.

In addition to its original platen press the shop currently boasts a Heidelberg Cylinder press; a Heidelberg offset press; two Heidelberg windmill presses; an A.B. Dick offset press; and state-of -the-art computer-controled copy and printing machines. A new Ryobi is planned for the near future. The shop foreman John, hired about two years ago to oversee day to day press operations, has more than 20 years experience including solid training and background in letterpress printing. The new and the old are blended together in the right proportions to keep the business moving forward in spite of competition from the corporate printing outlets. Those stores simply cannot provide the breadth of services or depth of experience available from Na-Vet and certainly not the personalized service.

I don't mean this post to sound like a commercial but I have been so impressed with their shop and have been so glad to get to know Larry and John on the two visits I've made to pick up equipment they were selling. I was first introduced about a year and a half ago. They were in the process of getting rid of a lot of type and other extra items to make room for new equipment. A few months ago they aquired a lot of older letterpress equipment from a large shop that closed and two weeks ago I made another visit to pick up some more type. Besides the type and other misc. things I needed, I once again was able to learn so much by watching the ongoing work. John is a great teacher and is quite ready to answer questions and show how things are done while he does them. In fact, he is starting to give letterpress classes both on the Heidelberg windmills and the C&P platen press. You will not go wrong spending a day or even a few hours with him.

How great is it that an active commercial shop is still around doing not only what it has always done but the things that are necessary to compete in the present day also? At some point I will have to get some photos of the shop as it looks today. For now, enjoy the vintage photo above.