


The restoration of the perforator is complete and it actually works. Huzzah! Given the amount of rust and the condition of the punches it was no certain thing. For the most part cleaning was pretty straightforward if involved as described in my previous post. The punches and the holes they go in were the most tedious and troublesome part.

The perforator takes 365 punches about 1/32” diameter and 13/16” long. There are three parts that have holes for the punches: the punch holder, the stripper, and the die. So I had to clean out as best I could 1095 holes. I had soaked the parts repeatedly in WD40 after I finally got the punches out and after cleaning them completely I used one of the punches to scrape out the holes as much as possible. The last step here was pushing the punch through, wiping the WD40 off the far end, push it through again, wipe again, etc. until all of the extraneous WD40 was out. This actually worked pretty well and when I was done the punches all moved freely in the holes. The concern I really had was if they would go through freely when they had to pass through all three parts at once.
When these three parts were manufactured and the holes for the punches were bored they were clamped together in a jig and the holes bored through all three at the same time. The three parts were stamped with the same number so they could always be matched up. This is how alignment was always assured. Of course, a lot had happened to the perforator since it was new so it remained to be seen if this alignment remained.
I had picked up the replacement screws I needed and after the last one was replaced in the die I reassembled the stripper bar and its stiffener, reassembled the head, and then put the head back on the machine. I was almost done but looking at the punches I realized that I really needed to clean them down to bare, shiny metal and not leave them with any corrosion, no matter how minor. I was concerned about leaving them too long in the vinegar and salt bath because the surface of the metal becomes rough, if only mildly, and I wanted the smoothest surface possible to ease passage through the holes. What all this meant is that I would have to clean each punch one at a time. Fun, fun, fun.

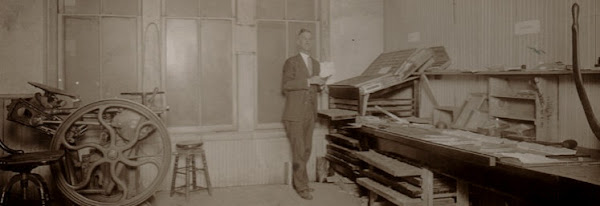
Of the 365 punches the machine takes all had been present and I was able to recover 214 that were straight. There are perhaps 50 or so more that are only slightly bent and which I’m confident I can straighten out at some point and install. The complete row of punches is 24” long but even with only the 214 installed there are enough to perforate anything of a size I’m likely to need. I do plan on buying brand new punches in the near future because the ends on the old ones are not in the best shape and new punches will mean cleaner holes. But it punches good enough for any normal work, certainly not something the average person would notice.
Anyway, one by one using sandpaper I cleaned the punches, rolling them around with the tip of one finger on some chipboard while I sanded away with the other hand. I was careful not to sand in such a way to round over the edges on the working end of the punches but of course they weren’t perfect at this point anyway. This operation took episodes of Marcus Welby, Quincy, Kojak, Deal Or No Deal, the local news, two episodes of Judge Judy, Judge Joe Brown, and Ghost Whisperer to complete. Whew!
I installed the punches from the center of the head out so the pressure of the punching action would be centered. They went in better than I expected, with a few needing a slight helping hand from the tip of a screwdriver instead of my finger. I put oil on top of the stripper where the punches passed through and then started pumping the pedal. This was to break up remaining “stuff” in the holes and to lubricate things. I put some paper towels in harm’s way and stair-stepped my way to a cleaner, well-oiled perforator. I moved the paper towel with each step and it soaked up the excess “stuff” pretty well. It still leaves a slight residue on the top sheet but there is less each time and it works nice and smooth.
I had taken the tables to work to sand them with a pneumatic random orbit sander. This makes the work go fast and does a great job. The wood is cherry and was originally stained. Even though the tops of both tables had virtually no finish left it was intact on the underside and I found a match for it among some old cans of stain I had. I sanded enough to get rid of the dirt and paper that had been stuck to the wood when it had gotten wet, and to make everything smooth, but not enough to remove the patina. I stained it at home and then applied two coats of orange (amber) shellac, a traditional vintage topcoat. In the end I was surprised that the match was so close. I wasn’t worried about dents, bumps, chips, etc. because these tables have little affect on registration which is accomplished by the fences. Mostly the simply support the sheets.
Next time I’ll explain more about what I plan on doing with it besides the obvious, i.e. making holes. One thing I did realize is that because the holes are so small, this is a nice vintage option for general jobs requiring perfing instead of the more usual slit perf. The paper stays together well but tears very easily. And it won’t tear up the press rollers. Oh, boy!

No comments:
Post a Comment